Connecting to OmniSci Using SAML
Security Assertion Markup Language (SAML) is used for exchanging authentication and authorization data between security domains. SAML uses security tokens containing assertions (statements that service providers use to make decisions about access control) to pass information about a principal (usually an end user) between a SAML authority, named an Identity Provider (IdP), and a SAML consumer, named a Service Provider (SP). SAML enables web-based, cross-domain, single sign-on (SSO), which helps reduce the administrative overhead of sending multiple authentication tokens to the user.
| Note | If you use SAML for authentication to OmniSci, and SAML login fails, OmniSci automatically falls back to log in using LDAP if it is configured. If both SAML and LDAP authentication fail, you are authenticated against a locally stored password, but only if the |
These instructions use Okta as the IdP and OmniSci as the SP in an SP-initiated workflow, similar to the following:
- A user uses a login page to connect to OmniSci.
- The OmniSci login page redirects the user to the Okta login page.
- The user signs in using an Okta account. (This step is skipped if the user is already logged in to Okta.)
- Okta returns a base64-encoded SAML Response to the user, which contains a SAML Assertion that the user is allowed to use OmniSci. If configured, it also returns a list of SAML Groups assigned to the user.
- Okta redirects the user to the OmniSci login page together with the SAML response (a token).
- OmniSci verifies the token, and retrieves the user name and groups. Authentication and authorization is complete.
- Connecting to omnisci_server using SAML tokens
- Enabling Role Synchronization with Okta
- Enabling SAML in Immerse
Connecting to omnisci_server using SAML tokens
These instructions describe how to use Okta to authenticate with OmniSci using SAML tokens. If you do not have an Okta, you can sign up on the Okta web page.
To connect to omnisci_server:
- Register your SAML application in Okta. See Setting up a SAML application in Okta for details.
- Create some Okta users and assign those users to the application.
- Download IdP metadata from your application settings (go to the Sign On tab).
- Copy the "Audience URI" you created in Step 7 of the Okta tutorial (this is the SAML SP target URL).
- Start omnisci_server without SAML.
- Create users with the same user names you created in Okta. User names typically correspond to email addresses unless you explicitly change them.
- Restart omnisci_server with SAML enabled using these parameters on omnisci.conf:
- saml-metadata-file is a path to Okta metadata file (for example, '/home/projects/omnisci/okta_md.xml').
- saml-sp-target-url is the "Audience URI" you copied earlier (for example, 'http://example.com/saml/sso/example-okta-com').
- Use a tool such as the "SAML Message Decoder" browser extension to track SAML traffic in your browser. You can choose any tool that shows SAML responses in base64.
- In your Okta metadata file, find your Single Sign-on service URI, marked as md:SingleSignOnService.
- Log out of your Okta account.
- Open the Okta login screen in your browser using the Single Sign-on service URL.
- Log in as an Okta user who has a corresponding user in omnisci_server. You are redirected to the Audience URI page (you might receive a 404 error, which you can ignore).
- Open your browser extension for SAML tracking and copy the base64-encoded SAML response.
- Run
omnisql, passing the token instead of a password. For example:
omnisql -u "your_user@your_email.com" -p "base64_saml_token_for_this_user";
- Unless you receive an "invalid credentials" error message, the login succeeds.
Enabling Role Synchronization with Okta
You can use SAML to create users and grant existing roles, but you cannot use SAML to create roles. Follow these steps to enable role synchronization, using OmniSci to Okta as the example.
- Log in to Okta as an administrator.
- Go to the Developer console.
- Open Application Settings > General > SAML Settings > Group Attribute Statements.
- Make the following changes:
- Set Name to Groups.
- Set Filter to the regular expression that matches the roles you want to pass to OmniSci.
- Save your changes.
- Start
omnisci_serverwith--saml-sync-rolesset to true. - Log in with your SAML token, as described in
Connecting to omnisci_server using SAML tokens. This time, the token
will contain the Groups attribute. For example:
<saml2:Attribute Name="Groups"
                 NameFormat="urn:oasis:names:tc:SAML:2.0:attrname-format:unspecified">
  <saml2:AttributeValue xmlns:xs="http://www.w3.org/2001/XMLSchema"
                 xmlns:xsi="http://www.w3.org/2001/XMLSchema-instance"
                 xsi:type="xs:string">Engineering</saml2:AttributeValue>
  <saml2:AttributeValue xmlns:xs="http://www.w3.org/2001/XMLSchema"
                 xmlns:xsi="http://www.w3.org/2001/XMLSchema-instance"
                 xsi:type="xs:string">Backend</saml2:AttributeValue>
  <saml2:AttributeValue xmlns:xs="http://www.w3.org/2001/XMLSchema"
                 xmlns:xsi="http://www.w3.org/2001/XMLSchema-instance"
                 xsi:type="xs:string">Employee</saml2:AttributeValue>
  <saml2:AttributeValue xmlns:xs="http://www.w3.org/2001/XMLSchema"
                 xmlns:xsi="http://www.w3.org/2001/XMLSchema-instance"
                 xsi:type="xs:string">Vacation</saml2:AttributeValue>
</saml2:Attribute>
Enabling SAML in Immerse
Follow these steps to configure SAML OKTA functionality for OmniSci Immerse:
- Follow the steps earlier in this topic to use Okta to authenticate with OmniSci
using SAML tokens, and to enable role synchronization.
When configuring SAML in Okta, make sure that the Single sign on URL and the Audience URI (SP Entity ID) are identical and follow the format:
http://localhost:port/saml-post
The recommended setting for Default RelayState is / (root).
- Open omnisci.conf, and make sure that the entry for
saml-sp-target-urlis identical to the URL set in Single sign on URL and Audience URI (SP Entity ID) in Okta. - In your
servers.jsonfile, add theSAMLurlentry and set it to the URL of your Identify Provider Single Sign-On URL in Okta. For example:"SAMLurl":"https://companydev-oktapreview.com/app/companydev/app/companydev/ekjn5w3viopw4BPxio)r54/sso/saml
When you open Immerse, if you have not yet been authenticated, you are redirected to Okta for login and authentication. After authentication, Okta sets a cookie and sends you back to Immerse. This cookie contains the session ID; as long as the session ID is valid, you do not need to reauthenticate.
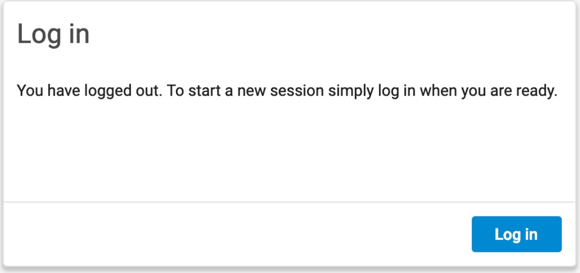
When you log out of Immerse, you see the following screen:

| Note | Logging out of Immerse does not log you out of Okta. If you log back in to Immerse and are still logged in to Okta, you do not need to reathenticate. |
If authentication fails, you see this error message:

Information about authentication errors can be found in the log files.
